Membuat User dan Admin Terpisah pada Rails yang menggunakan Devise
Table of Contents
Prerequisite
Ruby 2.6.3 Rails 5.2.4 PostgreSQL 11.5
Prakata
Kali ini saya ingin mencatat mengenai web aplikasi yang memiliki tampilan frontend terpisah antara user dan admin. Tentu saja dengan menggunakan Rails.
Contoh mudahnya seperti aplikasi blog, Wordpress atau Blogspot.
Kedua aplikasi ini disebut CMS (Content Management System). Di mana web aplikasi ini mempunyai dua buah tampilan yang berbeda antara tampilan untuk pengunjung dan tampilan untuk author (penulis) atau admin.
Nah, kegunaan pemisahan User dengan Admin pada catatan kali ini, nantinya dapat dimanfaatkan untuk membuat web aplikasi seperti CMS.
Eksekusi
Kali ini saya sedikit rajin.
Saya akan mencatat prosesnya dari awal project dibuat. Hehehe.
Inisiasi Project
Saya akan membuat project baru menggunakan Rails 5.2.4 dengan PostgreSQL sebagai database engine.
$ rails _5.2.4_ new blog_spot -d postgresql
Kalau proses pembuatan sudah selesai, masuk ke dalam project.
$ cd blog_spot
Periksa spesifikasi versi Rails dan Ruby.
$ ruby -v
ruby 2.6.3p62 (2019-04-16 revision 67580) [x86_64-linux]
$ rails -v
Rails 5.2.4
Selanjutnya create database dengan perintah berikut ini.
$ rails db:create
Created database 'blog_spot_development'
Created database 'blog_spot_test'
Lalu, jalankan Rails server untuk sekedar melihat apakah project berhasil dijalankan atau tidak.
$ rails s
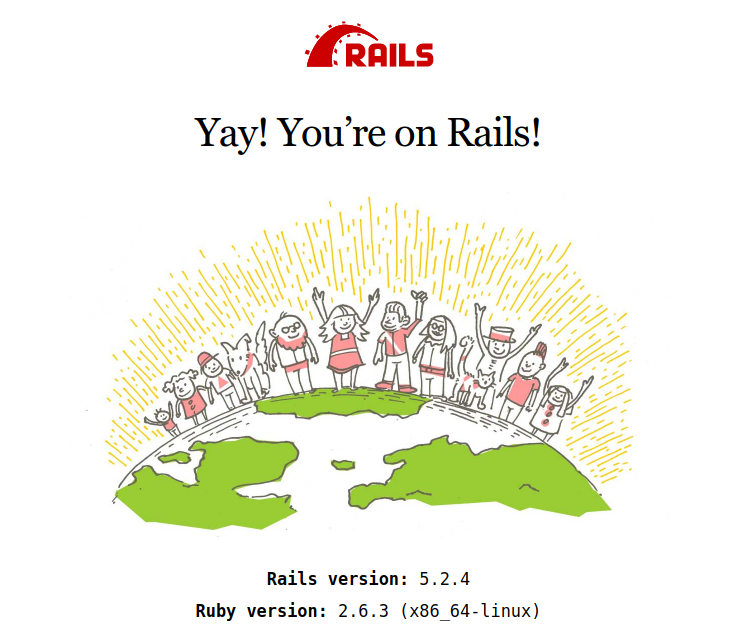
Gambar 1. Default Welcome Page pada Rails Project
Yay! Berhasil.
Entah mengapa saya suka melihat Default Rails Welcome Page ini. Dari sedikit web framework yang sudah saya coba seperti Codeigniter, Laravel, Django dan React. Rails memiliki tampilan Default Welcome Page yang menurut saya paling menarik.
Devise Gem
Devise adalah gem yang akan saya gunakan untuk menghandle authentication system.
Pasang pada Gemfile.
# ...
# ...
gem 'devise', '~> 4.7', '>= 4.7.1'
Install Devise gem yang baru saja kita pasang.
$ bundle install
Jalankan generator yang disediakan oleh Devise untuk menginisiasi file config yang disediakan oleh Devise.
$ rails generate devise:install
Running via Spring preloader in process 349251
     <span class="is-success">create</span>  config/initializers/devise.rb
     <span class="is-success">create</span>  config/locales/devise.en.yml
===============================================================================

Some setup you must do manually if you haven't yet:

  1. Ensure you have defined default url options in your environments files. Here
     is an example of default_url_options appropriate for a development environment
     in config/environments/development.rb:

       config.action_mailer.default_url_options = { host: 'localhost', port: 3000 }

     In production, :host should be set to the actual host of your application.

  2. Ensure you have defined root_url to *something* in your config/routes.rb.
     For example:

       root to: "home#index"

  3. Ensure you have flash messages in app/views/layouts/application.html.erb.
     For example:

       <p class="notice"><%= notice %></p>
       <p class="alert"><%= alert %></p>

  4. You can copy Devise views (for customization) to your app by running:

       rails g devise:views

===============================================================================
Hasil generate tersebut akan menghasilkan dua buah file yang dapat kita lihat pada output di atas.
Selanjutnya saya membuat model user dan admin dengan memanfaatkan generator yang disediakan oleh Devise.
Saya akan membuat untuk model admin terlebih dahulu.
$ rails g devise admin
Running via Spring preloader in process 368446
      invoke  active_record
      create    db/migrate/20191216044109_devise_create_admins.rb
      create    app/models/admin.rb
      invoke    test_unit
      create      test/models/admin_test.rb
      create      test/fixtures/admins.yml
      insert    app/models/admin.rb
       route  devise_for :admins
Kemudian untuk model user.
$ rails g devise user
Running via Spring preloader in process 368446
      invoke  active_record
      create    db/migrate/20191216044641_devise_create_users.rb
      create    app/models/user.rb
      invoke    test_unit
      create      test/models/user_test.rb
      create      test/fixtures/users.yml
      insert    app/models/user.rb
       route  devise_for :users
Lalu jalankan migration-nya.
$ rails db:migrate
== 20191216044109 DeviseCreateAdmins: migrating ===============================
-- create_table(:admins)
   -> 0.0167s
-- add_index(:admins, :email, {:unique=>true})
   -> 0.0134s
-- add_index(:admins, :reset_password_token, {:unique=>true})
   -> 0.0056s
== 20191216044109 DeviseCreateAdmins: migrated (0.0360s) ======================

== 20191216044641 DeviseCreateUsers: migrating ================================
-- create_table(:users)
   -> 0.0102s
-- add_index(:users, :email, {:unique=>true})
   -> 0.0077s
-- add_index(:users, :reset_password_token, {:unique=>true})
   -> 0.0064s
== 20191216044641 DeviseCreateUsers: migrated (0.0246s) =======================
Cek status dengan.
$ rails db:migrate:status
database: blog_spot_development

 Status   Migration ID    Migration Name
--------------------------------------------------
   up     20191216044109  Devise create admins
   up     20191216044641  Devise create users
Oke, migration untuk user dan model telah berhasil dimigrasikan ke skema database.
Dengan begini, sekarang saya sudah memiliki beberapa fitur yang disediakan oleh Devise, seperti:
- Authentikasi
- Registrasi
- Edit
- dll.
Devise juga mengenerate route untuk model admin dan user.
!filename: config/routes.rb
Rails.application.routes.draw do
  devise_for :admins
  devise_for :users
end
Cek route yang tersedia pada Browser.
http://localhost:3000/rails/info/routes
Selanjutnya, saya akan mulai dari controller.
Controller
Saya akan menggunakan Controller Namespaces and Routing.2. Untuk memisahkan antara admin dan user dengan struktur direktori seperti ini.
├─ 📂 app/
│  ├─ 📁 assets/
│  ├─ 📁 channels/
│  ├─ 📂 controllers/
│  │  ├─ 📂 admins/ 👈
│  │  │  └─ 📄 dashboard_controller.rb 👈
│  │  ├─ 📁 concerns/
│  │  ├─ 📂 public/ 👈
│  │  │  ├─ 📄 about_controller.rb 👈
│  │  │  ├─ 📄 contact_controller.rb 👈
│  │  │  └─ 📄 homepage_controller.rb 👈
│  │  ├─ 📂 users/ 👈
│  │  │  └─ 📄 dashboard_controller.rb 👈
│  │  ├─ 📄 admins_controller.rb 👈
│  │  ├─ 📄 application_controller.rb
│  │  └─ 📄 users_controller.rb 👈
│  ├─ ...
│  ...
├─ ...
...
Kemudian isi dari file-file controller tersebut akan seperti ini.
Untuk Controller Namespaces pada Admins.
!filename: app/controllers/admins_controller.rb
class AdminsController < ApplicationController
  layout :admins
end
!filename: app/controllers/admins/dashboard_controller.rb
class Admins::DashboardController < AdminsController
  def index; end
end
Untuk Controller Namespaces pada Users.
!filename: app/controllers/users_controller.rb
class UsersController < ApplicationController
end
!filename: app/controllers/users/dashboard_controller.rb
class Users::DashboardController < UsersController
  def index; end
end
Karena saya ingin membuat tampilan login yang berbeda antara Admin dengan User. Saya perlu mengaturnya pada application_controller.rb.3
!filename: app/controllers/application_controller.rb
class ApplicationController < ActionController::Base
  layout :layout_by_resource

  private

  def layout_by_resource
    if devise_controller? && resource_name == :admin
      'admins_devise'
    else
      'users'
    end
  end
end
Saya juga membuat homepage_controller.rb untuk menghandle halaman Homepage yang saya letakkan pada direktori public/
!filename: app/controllers/public/homepage_controller.rb
class Public::HomepageController < ApplicationController
  def index; end
end
Serta halaman About dan Contact.
!filename: app/controllers/public/about_controller.rb
class Public::AboutController < ApplicationController
  def index; end
end
!filename: app/controllers/public/contact_controller.rb
class Public::ContactController < ApplicationController
  def index; end
end
Langsung saja membuat action :index, yang nantinya akan digunakan untuk menampilkan text sederhana pada view template.
Route
Kemudian, untuk routingnya akan seperti ini.
!filename: config/routes.rb
Rails.application.routes.draw do
  # Root
  root to: "public/homepage#index"

  # Public
  scope module: :public do
    resources :about
    resources :contact
  end

  # Admins
  devise_for :admins
  namespace :admins do
    root to: "dashboard#index"
    resources :dashboard, only: %w[index]
  end

  # Users
  devise_for :users
  namespace :users do
    root to: "dashboard#index"
    resources :dashboard, only: %w[index]
  end
end
Pada block Public, saya menggunakan scope karena ingin membuat url yang singkat, seperti ini.
http://localhost:3000/about
Kalau menggunakan namespace maka url yang dihasilkan akan seperti ini.
http://localhost:3000/public/about
Maka dari itu, saya menggunakan scope untuk controller yang berada pada module Public
Selanjutnya ke view template.
View
Berikut ini struktur direktorinya.
├─ 📂 app/
│  ├─ 📁 assets/
│  ├─ 📁 channels/
│  ├─ 📁 controllers/
│  ├─ 📁 helpers/
│  ├─ 📁 jobs/
│  ├─ 📁 mailers/
│  ├─ 📁 models/
│  └─ 📂 views/
│     ├─ 📂 admins/ 👈
│     │  └─ 📂 dashboard/ 👈
│     │     └─ 📄 index.html.erb 👈
│     ├─ 📂 layouts/
│     │  ├─ 📂 admins/ 👈
│     │  │  └─ 📄 _nav.html.erb 👈
│     │  ├─ 📂 users/ 👈
│     │  │  └─ 📄 _nav.html.erb 👈
│     │  ├─ 📄 admins.html.erb 👈
│     │  ├─ 📄 admins_devise.html.erb 👈
│     │  ├─ 📄 application.html.erb
│     │  ├─ 📄 mailer.html.erb
│     │  ├─ 📄 mailer.text.erb
│     │  └─ 📄 users.html.erb 👈
│     ├─ 📂 public/ 👈
│     │  ├─ 📂 about/ 👈
│     │  │  └─ 📄 index.html.erb 👈
│     │  ├─ 📂 contact/ 👈
│     │  │  └─ 📄 index.html.erb 👈
│     │  └─ 📂 homepage/ 👈
│     │     └─ 📄 index.html.erb 👈
│     └─ 📂 users/ 👈
│        └─ 📂 dashboard/ 👈
│           └─ 📄 index.html.erb 👈
│
├─ ...
...
Berikut ini isi dari file-file view tersebut.
Kita mulai dari layouts/.
!filename: app/views/layouts/application.html.erb
<!DOCTYPE html>
<html>
  <head>
    <title>BlogSpot</title>
    <%= csrf_meta_tags %>
    <%= csp_meta_tag %>

    <%= stylesheet_link_tag    'application', media: 'all', 'data-turbolinks-track': 'reload' %>
    <%= javascript_include_tag 'application', 'data-turbolinks-track': 'reload' %>
  </head>

  <body>
    <%= render 'layouts/users/nav' %>
    <%= yield %>
  </body>
</html>
!filename: app/views/layouts/admins.html.erb
<!DOCTYPE html>
<html>
  <head>
    <title>Admin - BlogSpot</title>
    <%= csrf_meta_tags %>
    <%= csp_meta_tag %>

    <%= stylesheet_link_tag    'admins', media: 'all', 'data-turbolinks-track': 'reload' %>
    <%= javascript_include_tag 'admins', 'data-turbolinks-track': 'reload' %>
  </head>

  <body>
    <%= render 'layouts/admins/nav' %>
    <%= yield %>
  </body>
</html>
!filename: app/views/layouts/users.html.erb
<!DOCTYPE html>
<html>
  <head>
    <title>User - BlogSpot</title>
    <%= csrf_meta_tags %>
    <%= csp_meta_tag %>

    <%= stylesheet_link_tag    'users', media: 'all', 'data-turbolinks-track': 'reload' %>
    <%= javascript_include_tag 'users', 'data-turbolinks-track': 'reload' %>
  </head>

  <body>
    <%= render 'layouts/users/nav' %>
    <%= yield %>
  </body>
</html>
Saya membuat halaman login yang berbeda antara Admin dengan User.
Halamn login untuk User akan menggunakan template dari Devise, sedangkan Admin, akan saya custom sendiri. Seperti di bawah ini.
!filename: app/views/layouts/admins_devise.html.erb
<!DOCTYPE html>
<html>
  <head>
    <title>Admin - BlogSpot</title>
    <%= csrf_meta_tags %>
    <%= csp_meta_tag %>

    <%= stylesheet_link_tag    'admins', media: 'all', 'data-turbolinks-track': 'reload' %>
    <%= javascript_include_tag 'admins', 'data-turbolinks-track': 'reload' %>
  </head>

  <body>
    <%= render 'layouts/admins/nav' %>

    <!-- Admin Custom Sign In -->
    <% if controller_name == 'sessions' %>
      <h2>Hello, Admin</h2>
    <% elsif controller_name == 'registrations' %>
      <h2>Become an Admin</h2>
    <% end %>
    <div>
    <% if controller_name == 'sessions' %>
      <%= form_for(resource, as: resource_name, url: session_path(resource_name)) do |f| %>
        <%= f.email_field :email, autofocus: true, autocomplete: "email", class: "", placeholder: "Email" %>
        <%= f.password_field :password, autocomplete: "current-password", class: "", placeholder: "Password" %>
        <%= f.submit "Sign In", class: "" %>
      <% end %>
    <% elsif controller_name == 'registrations' %>
      <%= form_for(resource, as: resource_name, url: registration_path(resource_name)) do |f| %>
        <%= f.email_field :email, autofocus: true, autocomplete: "email", class: "", placeholder: "Email" %>
        <%= f.password_field :password, autocomplete: "current-password", class: "", placeholder: "Password" %>
        <%= f.submit "Sign Up", class: "" %>
      <% end %>
    <% end %>
    </div>
    <div>
      <% unless controller_name == 'registrations' %>
        <%= link_to "Become an Admin", new_admin_registration_path, class: "" %>
      <% end %>
    </div>
    <!-- END Admin Custom Sign In -->

  </body>
</html>
Pada keempat file view template di atas, saya menambahkan render partial untuk menu navigasi.
Saya juga mengarahkan stylesheet_link_tag dan javascript_include_tag pada masing-masing direktori asset (application, users, admins) yang nantinya akan saya tambahkan setelah selesai dengan strukturl html.
Oke, selanjutnya file render partial untuk menu navigasi.
!filename: app/views/layouts/admins/_nav.html.erb
<nav>
  <% unless controller_name == 'homepage' && action_name == 'index' %>
      <%= link_to "Homepage", root_path %> |
  <% end %>
  <%= link_to "About", about_index_path, class: "#{'active' if controller_name == 'about'}" %> |
  <%= link_to "Contact", contact_index_path, class: "#{'active' if controller_name == 'contact'}" %> |
  <% if admin_signed_in? %>
    <%= link_to "Admin Dashboard", admins_root_path, class: "#{'active' if controller_name == 'dashboard'}" %> |
    <%= link_to "Log Out", destroy_admin_session_path, method: :delete %>
  <% else %>
    <%= link_to "Log In", admin_session_path, class: "#{'active' if controller_name == 'sessions'}" %>
    | <%= link_to "User?", user_session_path %>
  <% end %>
</nav>
!filename: app/views/layouts/users/_nav.html.erb
<nav>
  <% unless controller_name == 'homepage' && action_name == 'index' %>
      <%= link_to "Homepage", root_path %> |
  <% end %>
  <%= link_to "About", about_index_path, class: "#{'active' if controller_name == 'about'}" %> |
  <%= link_to "Contact", contact_index_path, class: "#{'active' if controller_name == 'contact'}" %> |
  <% if user_signed_in? %>
    <%= link_to "User Dashboard", users_root_path, class: "#{'active' if controller_name == 'dashboard'}" %> |
    <%= link_to "Log Out", destroy_user_session_path, method: :delete %>
  <% elsif admin_signed_in? %>
    <%= link_to "Admin Dashboard", admins_root_path, class: "#{'active' if controller_name == 'dashboard'}" %> |
    <%= link_to "Log Out", destroy_admin_session_path, method: :delete %>
  <% else %>
    <%= link_to "Log In", user_session_path, class: "#{'active' if controller_name == 'sessions'}" %>
    | <%= link_to "Admin?", admin_session_path %>
  <% end %>
</nav>
Selanjutnya Homepage.
!filename: app/views/public/homepage/index.html.erb
<header>
  <h1>Homepage</h1>
</header>

<div>
  <p>
    => <%= controller_name %>#<%= action_name %>
  </p>
</div>
Halaman About dan Contact.
!filename: app/views/public/about/index.html.erb
<header>
  <h1>About</h1>
</header>

<div>
  <p>
    => <%= controller_name %>#<%= action_name %>
  </p>
</div>
!filename: app/views/public/contact/index.html.erb
<header>
  <h1>Contact</h1>
</header>

<div>
  <p>
    => <%= controller_name %>#<%= action_name %>
  </p>
</div>
Kemudian, halan Dashboard untuk Admin dan User.
!filename: app/views/admins/dashboard/index.html.erb
<header>
  <h1>DashBoard Admin</h1>
</header>

<div>
  Admin: <%= current_admin.email %>
</div>
!filename: app/views/users/dashboard/index.html.erb
<header>
  <h1>DashBoard User</h1>
</header>

<div>
  User: <%= current_user.email %>
</div>
Sekarang tinggal Stylesheet dan Javascript.
├─ 📂 app/
│  ├─ 📂 assets/
│  │  ├─ 📁 config/
│  │  ├─ 📁 images/
│  │  ├─ 📂 javascripts/
│  │  │  ├─ 📂 admins/ 👈
│  │  │  │  └─ 📄 custom.js 👈
│  │  │  ├─ 📁 channels/
│  │  │  ├─ 📂 users/ 👈
│  │  │  │  └─ 📄 custom.js 👈
│  │  │  ├─ 📄 admins.js 👈
│  │  │  ├─ 📄 application.js
│  │  │  ├─ 📄 cable.js
│  │  │  └─ 📄 users.js 👈
│  │  └─ 📂 stylesheets/
│  │     ├─ 📂 admins/ 👈
│  │     │  └─ 📄 custom.css 👈
│  │     ├─ 📂 users/ 👈
│  │     │  └─ 📄 custom.css 👈
│  │     ├─ 📄 admins.css 👈
│  │     ├─ 📄 application.css
│  │     └─ 📄 users.css 👈
│  ├─ ...
│  ├─ ...
...
Mengikuti struktur direktori di atas.
Javascript Assets
Pada javascripts/application.js tambahkan user.js. Karena saya akan menggunakan sebagai satu kesatuan assets.
!filename: app/assets/javascripts/application.js
//= require rails-ujs
//= require activestorage
//= require turbolinks
//= require users
Lalu pada masing-masing file Javascript untuk Admin dan User, tambahkan rails-ujs agar Devise dapat Logout.
Kalau tidak menambahkan ini, Devise akan mengalami routing error saat melakukan Logout.
!filename: app/assets/javascripts/admins.js
//= require rails-ujs
!filename: app/assets/javascripts/users.js
//= require rails-ujs
Untuk admins/custom.js dan users/custom.js digunakan untuk Javascript buatan kita sendiri. Namun karena masih kosong, jadi tidak saya contohkan.
Stylesheet Assets
Pada stylesheets/application.css tambahkan user.css. Karena saya akan menggunakan sebagai satu kesatuan assets.
Saya menghapus *=require file yang lain agar file stylesheet tidak saling tumpang tindih dan dipanggil dimana-mana.
!filename: app/assets/stylesheets/application.css
/*
 *= require users
 */
Kemudian pada admins.css dan users.css saya akan mengarahkan asset pada custom.css di masing-masing direktori.
File custom.css inilah yang nantinya akan digunakan apabila ingin mengkostumisasi style pada Admin atau User view.
!filename: app/assets/stylesheets/admins.css
@import 'admins/custom.css';
!filename: app/assets/stylesheets/users.css
@import 'users/custom.css';
Selanjutnya, isi dari ../admins/custom.css dan ../users/custom.css.
Untuk contoh kali ini, saya membuat style antar Admin dan User menjadi terlihat serupa.
Namun, pada project yang sesungguhnya, kedua file ini akan memiliki isi yang berbeda, sesuai dengan keperluan.
!filename: app/assets/stylesheets/admins/custom.css
h1,h2 {
  color: #c52f24;
}

div {
  margin: 5px;
}

a {
  color: #c52f24;
  text-decoration: none;
  border-bottom: 1px dotted #c52f24;
}

nav {
  margin: 5px;
}

.active {
  font-weight: bold;
}
!filename: app/assets/stylesheets/users/custom.css
h1,h2 {
  color: #c52f24;
}

div {
  margin: 5px;
}

a {
  color: #c52f24;
  text-decoration: none;
  border-bottom: 1px dotted #c52f24;
}

nav {
  margin: 5px;
}

.active {
  font-weight: bold;
}
Selanjutnya, saya perlu untuk menambahkan konfigurasi tambahan untuk Precompile Additional Assets, karena saya sudah membuat custom assets untuk admins dan users.
Buka file config/initializers/assets.rb.
!filename: config/initializers/assets.rb
# Precompile additional assets.
# application.js, application.css, and all non-JS/CSS in the app/assets
# folder are already added.
Rails.application.config.assets.precompile += %w( admins.js admins.css users.js users.css )
Uncomment dan tambahkan users.js dan users.css.
Oke, saya rasa, sudah semuanya.
Sekarang web aplikasi siap untuk di jalankan.
$ rails s
Kira-kira, seperti inilah hasilnya.
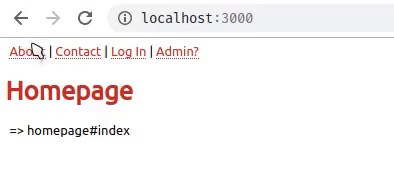
Gambar 2. Public Page
Gambar 3. User Login, Register Dashboard

Gambar 4. Admin Login dan Register
Selesai!
Kerangka untuk membuat Web Aplikasi yang memiliki Halaman Public, Admin Dashboard dan User Dashboard sudah selesai.
Teman-teman dapat melihat source codenya pada halaman GitHub di sini.
Mudah-mudahan dapat bermanfaat.
Terima kasih.
(^_^)
Referensi
-
github.com/plataformatec/devise
Diakses tanggal: 2019-12-15 -
guides.rubyonrails.org/routing.html#controller-namespaces-and-routing
Diakses tanggal: 2019-12-15 -
github.com/plataformatec/devise/wiki/How-To:-Create-custom-layouts
Diakses tanggal: 2019-12-15